

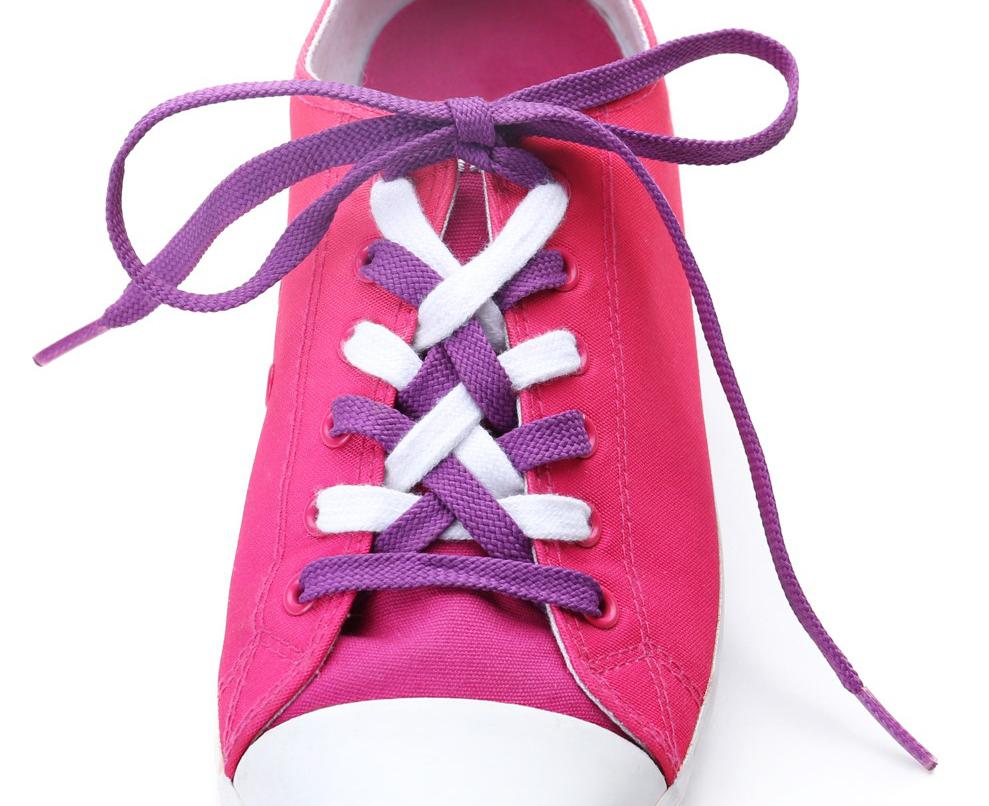
Originally and beautifully laced boots or sneakers will add individuality to your look. In addition, proper lacing is the key to convenient and comfortable wearing of shoes. We have collected ten examples of lacing that prove this.
- 1. Straight lacing
- 2. “Corset”
- 3. Stairs
- 4. Butterfly
- 5. Cross
- 6. Double
- 7. Cobweb
- 8. Chess
- 9. Loops
- 10. “Railroad”
Various lacing techniques allow you to experiment with both the pattern and the palette. You can lace each shoe in a different color or combine two shades on one sneaker. To make the lacing look unusual, weave a complex pattern, decorate the laces with beads or other decorations.
1. Straight lacing
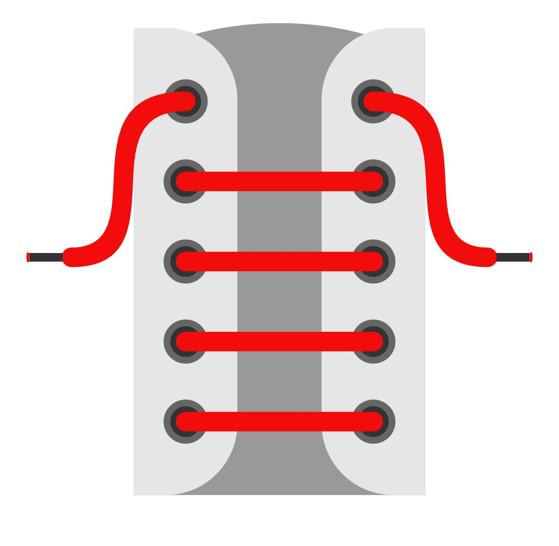
A variant of standard lacing that does not require any special skills. Straight lacing looks equally good with both wide flat and round laces. The main difference between straight lacing is that one half of the lace is threaded through rows of loops, and the second is pulled under the block (the part in which the eyelets for the laces are made) from the lower eyelet (hole) to the upper one.
How to tie sneakers with straight lacing
- Turn the boot with the toe facing you and thread the lace through the bottom pair of eyelets so that it forms a bridge on the front side.
- Take the left lace and pull it from the bottom to the very top on the inside. The eglet (the tip of the lace) should come out in the top left and last hole.
- Pass the right lace also under the bottom, but only to the next right loop. Thread it through the block and flip it to the opposite side – it should go into the left hole in the same row.
- Repeat this step for each row of holes until you reach the very top.
2. Corset lacing
The name of the method speaks for itself – it uses the same principle as when tightening corsets. As a result, the lacing is strong and tight. Outwardly, it looks impressive, especially with high boots. The main difference between the “corset” and the method described above is that two laces are used on each shoe. They should be shorter than usual. There are more complex methods with one lace, but first it is better to master the classic version.
How to lace boots with a corset
- Prepare two laces for each shoe. Don’t take too long, the shorter the better.
- Count the number of holes on the subblock and divide them equally. For example, if the holes six, the three lower and three upper ones must be laced separately.
- Start lacing from the bottom using the standard criss-cross technique. Lace three rows, release the free edges of the laces outward and move them to the side.
- Do the same, starting with the top blocks. After lacing three rows, move the laces to the side.
- On each side, tie the free edges of the laces together: left to left, right to right. You should end up with two large loops.
- Tighten the lower and upper crosshairs until the leg is comfortable. After this, tie two loops into a bow. It should be in the center of the ankle.
3. Lacing ladder
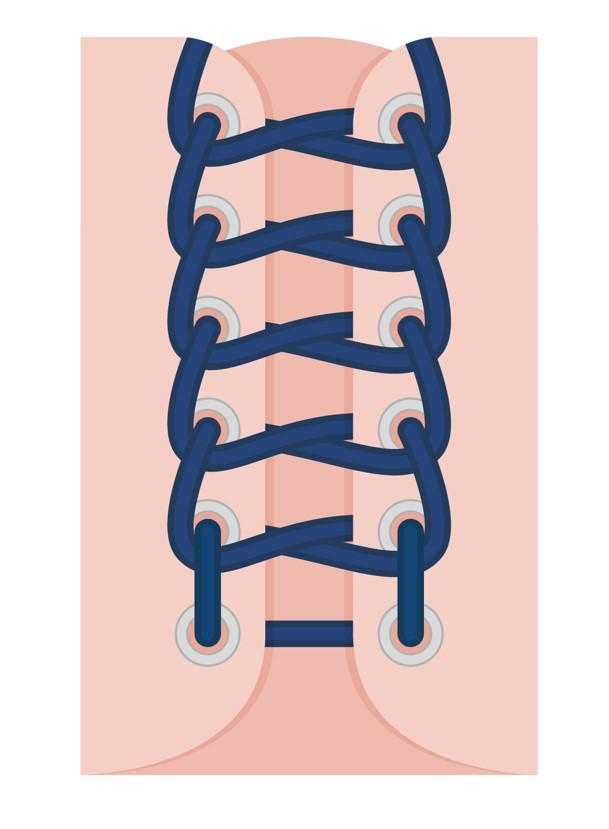
The technique of lacing with a ladder is a little more complicated, but the end result looks more attractive and unusual. This method is especially suitable for long laces that need to be shortened. In addition, lacing with a ladder better fixes the foot, the tension practically does not weaken.
How to lace sneakers with stairs
- Pass the lace through the bottom holes on the inside. It should lie on the tongue of the shoe.
- Make sure the left and right pieces are the same length.
- Take the right lace and go through the hole at the top of the next row. Pass the lace from the outside to the inside. Repeat the same with the other lace. At this stage, do not tighten the laces too much; they should remain loose.
- Take the right lace again and pass it through the opposite loop – on the left. Do this so that it is under the left lace. Pull the left lace in the same way.
- Repeat until you reach the top of the boot. At the end, tie it tightly.
4. Lacing with butterfly
This method is called a butterfly for its similarity to a tie of the same name, although in some variations of the technique it is possible to replicate the features of a real butterfly. The good thing about this method is that it allows you to use your imagination. Depending on the occasion, use multi-colored large laces or even ribbons in butterfly lacing, if you need to dilute a strict look, thin leather laces are also suitable. To begin with, you can master the basic technique, in which you get two crosshairs on the front of the boot.
How to tie shoes with a bow tie
- Place the boot with the toe facing you and pass the lace through the bottom pair of eyelets along the front.
- Thread the right lace from the inside into the next top block and at the exit pull it diagonally to the left hole (the eyelet should go into the left eyelet in the third row from the bottom). Do the same with the left lace.
- Repeat the step again until you reach the last top holes.
- Spread the laces to the sides, adjust the tension and tie with a bow.
5. Cross lacing
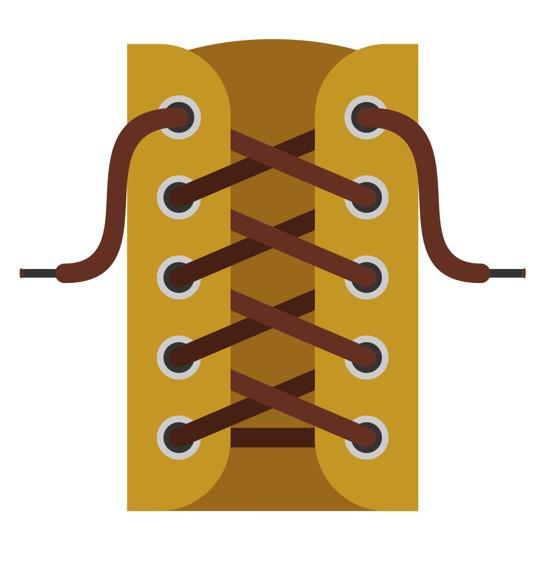
Cross lacing, or criss-cross lacing, is one of the most popular ways to tie shoelaces. This method is simple and versatile: almost all types of shoes can be laced crosswise, from formal boots to sports sneakers.
How to Lace Sneakers Crosswise
- Thread the cord through the two bottom holes so that it is under the block.
- Grab the laces by the agglets—the plastic or metal clips at the ends—and lift them up, making sure the two ends are the same length.
- Pass the right lace up through the block located diagonally. Then do the same with the edge of the lace that comes out of the left eyelet.
- Continue lacing until you reach the last blocks at the top.
- Straighten the laces and adjust their tension if necessary. Tie the loose ends into a bow or tuck them inside under the tongue.
There is another way of classic criss-cross lacing: in it, the laces are passed through the lower holes so that the lace goes from above, and does not lie on the tongue.
6. Double lacing
Double lacing is a technique that uses two colors of laces. The idea is that two laces are tied in a knot and threaded into opposite loops after twisting in the middle.
How to make double lacing in different colors
- Take two laces of matching colors and tie their edges together. Make sure the knot is tight enough that it won’t come loose.
- Thread the first color of lace through the bottom hole so that the knot can be hidden under the tongue.
- Pull it diagonally and cross it in the center with the second color lace. As a result, the eglet of the lace of the first color should again be on the left.
- Pass it through the block on the right side, making sure it enters the eyelet from the top and not from the bottom. In the same way, thread the right lace through the eyelet.
- Repeat in a similar manner until you reach the end.
7. Gossamer lacing
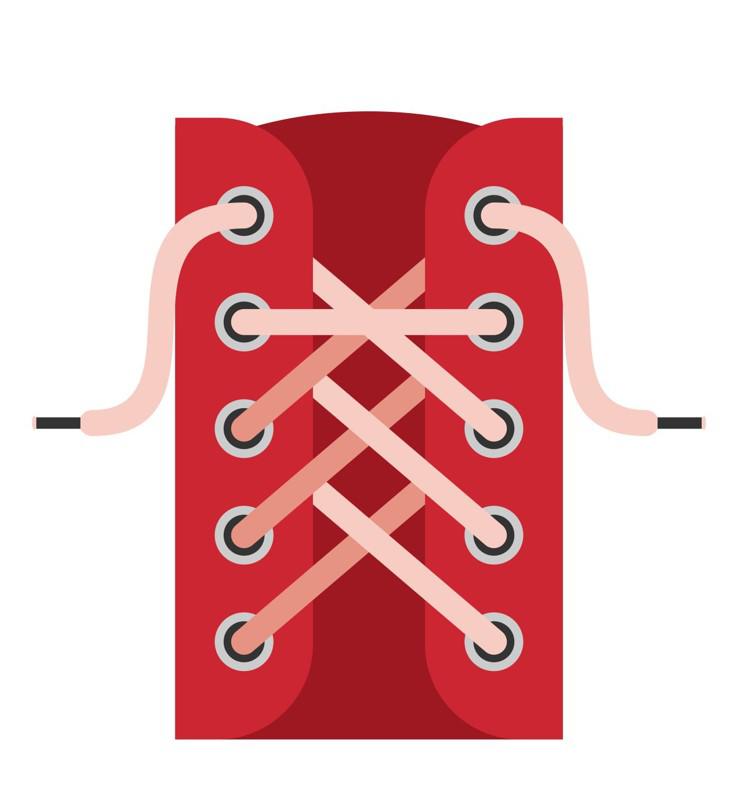
According to this pattern, the laces are woven vertically and diagonally, forming an intricate web. More…